so! according to little mr. internet, reupholstering a chair is easy! all you gotta do is take it apart, use the fabric pieces as a pattern and put it back together! ta-da! well, what it didnt tell me was taking the damn thing apart is HARD!
i've got this ugly chair, and i thought, hey, let's give this a try! now, i dont know if it's always this hard? maybe the chair i have is just well put together? maybe the person who did it was super duper excited about using a staple gun or something and went a little wacky? i dont know? but it aint easy. those things are in there deep, and there are a whole whole lot of them.. LOTS!!!
at first i just tried to pry them out with various.. tools? i think i tried a knife and some needle nose pliers, but the knife wouldnt get right in there so i got out a little bitty screwdriver and tried that out.. but then i broke that! so ack!!! i had to go out and buy an actual staple remover tool, but even with that it's difficult.
i have been working away at it though, and i kinda figured that maybe i should take some pictures and keep track of how i am taking it apart so that i can put it back together properly! so, hopefully i can at least do that!
so.. this is my ugly chair..
i started on the bottom...
that bottom fabric was already torn and a lot just ripped off, but i still had to remove the staples. the legs just screwed off, so that was easy enough!
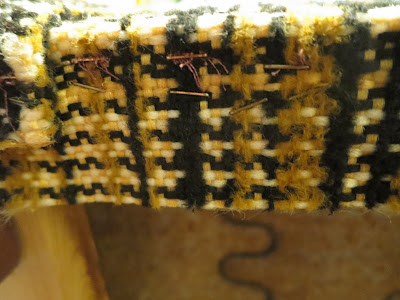
here is a slight example of the excessive amount of staples in this damn thing.. why does it need 5 staples in about an inch or so? why? and it's like this all the way around.. that's a hell of a lot of staples!
i took off the back section of fabric as well, it was pretty easy actually. after the bottom was done i was able to pretty much just pull up a lot of the sides and it was pretty easy to pry up the rest, it looked like this...
this is what the back of the chair looks like once the fabric is removed:
that one spring or whatever is popping up but i was able to fix that easily, it just needed to be re-hooked back into a little ... hook thingy?
so.. that is the bottom and the back removed anyway.
Tuesday, 29 November 2016
Friday, 7 October 2016
ecodye test roll 2
this is the second roll of my ecodye test experiment, an attempt to try a variety of leaves and document the results!
lilac - raspberry - butterfly bush
butterfly bush - wild licorice - nanking cherry - mint
nanking cherry - mint - strawberry - wild rose
strawberry - wild rose - mountain ash
so here's the other side.. you can see the results..
raspberry - a nice print with various shades of browns and greens
lilac - a light yellow print, not a very strong result
butterfly bush -very light beige sorta print, am thinking this would probably wash out..
nanking cherry - nice yellow print
wild licorice - a pretty good print, yellow with some brownish tinge
mint - not much of a result at all
strawberry - a nice print, yellow and brown specks
wild rose - nice strong well defined prints, greenish purple hues
mountain ash - a good print, strong colour, greenish, brown with orange hints
strawberry - a nice print, yellow and brown specks
wild rose - nice strong well defined prints, greenish purple hues
mountain ash - a good print, strong colour, greenish, brown with orange hints
this is on a beige fabric, it's unwashed or rinsed, but the fabric was pretty dry at the time the pictures were taken. done in september.
Thursday, 29 September 2016
ecodye leaf test part 1
i decided to do a leaf test.. testing out various different types of leaves of different trees and things, mostly trees. a lot of them i havent even tried before. i know ecodyeing isnt a sure thing and when something does one thing one time it is not necissarily gonna do the same thing the next, but it'll be a general idea.
Roll 1.
Roll 1.
amur choke cherry - walnut - manitoba maple - american elm
manitoba maple - american elm - mayday - green ash
mayday- green ash - siberian elm - hawthorn
the other side showed the results a bit better.. and this is what i found..
maple - a light but clear brownish result, i have found maple to produce fairly good results in the past.
amur maple - a good result with almost purplish hues to it
amur choke cherry - a nice yellow print, not extremely strong, but nice colour
walnut - a nice clear yellowy brown print
manitoba maple - not a lot of result
american elm - not a lot of result, produced a nice relief though!
mayday - very clear lovely green print!
green ash - not a lot of result
siberian elm - a nice yellow print
hawthorn- a nice yellow print
this was done in september, note that this fabric was just unrolled, it was fairly dry but it has not been rinsed or washed. the fabric used was a light beige colour, i got a very large piece (a few meters) at the reuse center (free) and thought wow! but then figured out why someone had got rid of it, it's terrible! you cant even put a single stitch in it cause it will tear, any hole in it and it will rip apart, so it is completely useless to sew into anything. but still, dye experiments!!!
Wednesday, 3 February 2016
forcing tulips again..
so.. last year i forced some tulips and they were lovely!
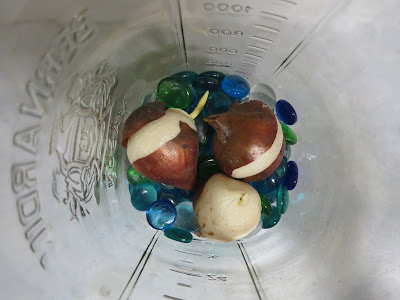
so this year i decided to do the same! earlier in the year i bought some bulbs, just from dollarama.. that's where the ones above were from! and they have been sitting in my fridge and finally the other day i got around to doing something with them! thing is, i know.. i mean, i KNOW that after these ones from last year were through i cleaned the container i had them in and put it somewhere safe cause i knew i would do it again this year and i cant find it ANYWHERE!!! i looked and looked and looked! my house is not very big.. and ive organized things, so.. ugh. i dont know.. but i just used a giant jar this time.. and some glass rocks..
that's the set up.. and that's the package in the back, with the pink and orange.. the pink one next to it are the bulbs from last year.. not really what they ended up looking like eh? but they were quite pretty!
these bulbs seemed to be kinda poking through in the fridge already.. so.. ok..
we shall see how well these ones do!
i also had bought some anemones cause they looked so gosh darn purty! i dont know if they can be forced like tulips.. i didnt look it up.. and the bulbs, they look like little rocks, so i am thinking maybe not? i dont know.. i figure, you never know until you try!
i just stuck them in a little pot.. and well.. i guess i will find out!
but i did all this on jan 29th, so.. we will see how long it takes these tulips and if and when the anemones turn into something! yay!
Saturday, 9 January 2016
ecodye - pine!~
perhaps this post is a bit premature.. i am not super impressed with my photos & i have not quite identified the tree i used, all i know is that it is some kind of pine.. but i felt like making it anyway! ..this was my first ecodye experiment with evergreens!~
i picked the branches on a walk down to the river.. it was a tree along ada blvd.
the sun was actually pretty much down at this point, so the pictures are not as clear as i would have liked.. ugh. see.. the photo below, was taken even before and is actually of the tree next to it.. and i think it as actually of a different type of pine altogether because as i was picking the branches, i just happened to feel the branches of this other tree and well, they were different.
i um.. steeped? ..maybe processed is the word? the branches in steaming hot water for 10min. these are them when i put them in..
after doing that they had significantly lost their green.. they were more of a ..well.. i dont know.. but less green & yeah.. that stove top is really dirty, i see.. but i dont use it to cook & well.. i havent washed it in awhile & i dont care. next i soaked them in a homemade iron solution for 30min or so.. then i laid them out on my fabric... this fabric, well, it was a remnant that i got at the reuse center.. so it is 'fabric unknown' ..but from burning a little bit i am guessing that it is some sort of blend.. i am guessing that there is a bit of poly in there somewhere? ..it didnt totally curl up or anything.. but it didnt burn nice and clean either..
so.. after laying them out, i just rolled it up and tied it up tight. then i steamed it in my makeshift steamer for an hour, flipping it partway through.. which is good, because when i opened it up to check i noticed that it had fallen and part of it was submerged in the water.. oops. after an hour i turned off the heat and just left it in there to cool. and then about 3 days later i opened it up.
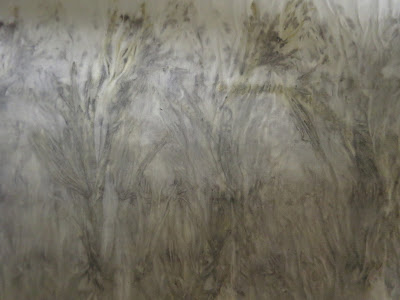
and it looked like this:
i took some pictures in more detail.. but well.. the lighting in my house is rotten.. so ugh. but here goes..
the fabric had really bunched up in the process, so i attempted to pull it straight and take some pictures.. not too easy mind you.
and then.. some details.. hopefully...
i think that it looks pretty neat. & i also think that if it was pure cotton then it would show up better, cause this fabric was a little strange.. or also that if i soaked the branches in the iron longer that would work better too! but i will experiment again!
i picked the branches on a walk down to the river.. it was a tree along ada blvd.
the sun was actually pretty much down at this point, so the pictures are not as clear as i would have liked.. ugh. see.. the photo below, was taken even before and is actually of the tree next to it.. and i think it as actually of a different type of pine altogether because as i was picking the branches, i just happened to feel the branches of this other tree and well, they were different.
i um.. steeped? ..maybe processed is the word? the branches in steaming hot water for 10min. these are them when i put them in..
after doing that they had significantly lost their green.. they were more of a ..well.. i dont know.. but less green & yeah.. that stove top is really dirty, i see.. but i dont use it to cook & well.. i havent washed it in awhile & i dont care. next i soaked them in a homemade iron solution for 30min or so.. then i laid them out on my fabric... this fabric, well, it was a remnant that i got at the reuse center.. so it is 'fabric unknown' ..but from burning a little bit i am guessing that it is some sort of blend.. i am guessing that there is a bit of poly in there somewhere? ..it didnt totally curl up or anything.. but it didnt burn nice and clean either..
and it looked like this:
i took some pictures in more detail.. but well.. the lighting in my house is rotten.. so ugh. but here goes..
the fabric had really bunched up in the process, so i attempted to pull it straight and take some pictures.. not too easy mind you.
and then.. some details.. hopefully...
i think that it looks pretty neat. & i also think that if it was pure cotton then it would show up better, cause this fabric was a little strange.. or also that if i soaked the branches in the iron longer that would work better too! but i will experiment again!
Subscribe to:
Comments (Atom)


